Roof Re-Covering: Building Code Facts

ROOF RE-COVERING: BUILDING CODE FACTS

ROOF RE-COVERING: BUILDING CODE FACTS

ROOF RECOVERING
The 2009 International Residential Building Code Section (IBC) R907 governs the design, materials, construction, and quality of roof assemblies. IRC Chapter 9 Section R907.2 requires structural roof components to adequately support the roof covering system and the material and equipment loads encountered during its installation. The strength of a roof assembly can impact its performance, functionality, and relative safety.
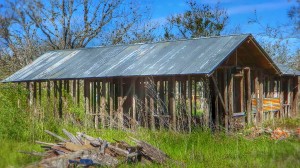
Recently, I reviewed a proposed repair procedure for a wind and water damaged roof system. The subject roof system consisted of two roof covering layers: an original wood shingle layer and a secondary asphalt roof layer placed on top of the wood shingles. The repair procedure essentially called for removing individual water and wind damaged shingles and merely replacing them with a corresponding new shingle. And, presumably, each new shingle installed would then connect to, or through, the original wood shingle roof covering system. As written, this particular roof recovering method violated the International Building Code, section R907.2 because it provided no method to assure the structural adequacy of the underlying wood shingle roof structure.
Indeed, data and analysis suggest wood shingle roof systems exposed to prolonged water and wind likely lose some of their structural support adequacy within their damaged areas. As a practical matter, verifying the structural adequacy of the in-place wood roof system is tantamount to its complete removal. This is because the cost of removing, testing, and reinstalling damaged wood shingle roof systems can easily equal or exceed their full replacement with new roof covering systems. Knowing this, IRC Section R907.3 “Recovering versus replacement.” requires removing all existing layers of roof coverings when installing new roof coverings when any one of the following conditions exist:
1. The existing roof or roof covering is water-soaked or has deteriorated to the point that the existing roof or roof covering is not adequate as a base for additional roofing. 2. Where the existing roof covering is wood shake, slate, clay, cement or asbestos-cement tile. 3. Where the existing roof has two or more applications of any type of roof covering. 4. For asphalt shingles, when the building is located in an area subject to moderate or severe hail exposure.
2009 International Residential Building Code re-roofing requirements are clear: removing and replacing damaged roof coverings with new roof coverings requires first removing all existing layers of roof coverings if the existing roof covering system is not structurally sound, is composed of wood shakes, or if it has two or more applications of any type of roof covering.
So, if data and analysis shows damaged roof covering assemblies meet one or more of these IRC requirements, all existing roof covering layers must be removed before installing new roof coverings.

Roof Re-Covering:  Building Code Facts  Roof Re-Covering:  Building Code Facts  Roof Re-Covering:  Building Code Facts   

Cantilevered Decks: Top 23 Waterproofing Tips

Covered patio or second floor deck leaking? Here are 23 simple moisture-proofing strategies to help prevent damaging water intrusion into your deck system.

Cantilevered structural deck systems safely separate exterior habitable areas from the surrounding ground surface environment. When covered, these deck (a. k. a. terraces, patios, etc.) structures shelter occupants from the undesirable effects of direct exposure to the outside environment. When elevated and structurally connected to building walls, these deck systems allow unobstructed panoramic views while safely supporting their occupant loads.

Building material products sensitive to adverse weather such as hardwood floors, unprotected structural wood members, and sheetrock must be adequately protected to prevent their damage and decay. Dry wood structural members can expand, twist, distort, and deflect unpredictably when exposed to ongoing excessive moisture. If rainwater infiltrates into the deck and wall structural cavities, it provides a continuous moisture source to the dry wood structural components supporting each deck (North and southeast decks). The result: structural component deflection which transfers excessive tension stress to its connected brittle material coverings causing visible stucco and tile separations. Here are twenty three tips to help waterproof your cantilevered patio deck:

  1. Stucco penetrations such as metal deck railing should be properly flashed or integrated into the water-resistive barrier before lath and stucco installation.
  2. Water-resistive barriers degraded by moisture exposure or damaged by tearing should be replaced before applying the stucco.
  3. Place water resistive barriers to assure all exterior moisture sensitive material surfaces are completely covered.
  4. Install wood based deck sheathing panels in accordance with APA requirements with 1/8 inch spaces between all meeting panel edges.
  5. Water-resistive barriers that have been degraded by moisture exposure or damaged by tearing should be replaced prior to the application of stucco.
  6. Place water resistive barriers to assure covering the entire exposed surface of the floor support beams and girders where possible without having to remove undamaged materials or demolishing functional structural connections.
  7. Paper backed stucco lath shall have at least one barrier layer of an approved water resistant paper backing.
  8. An approved water resistive barrier is one layer of No. 15 asphalt felt, free from holes and breaks, complying with ASTM D 226 for type I felt, or an equal alternative or better. Equal alternatives are DuPont Tyvek (Home wrap, Commercial wrap, and Stucco wrap) or equal.
  9. Placement of at least two water resistant barrier layers is recommended (not required) between stucco metal lath and any untreated natural wood surface to enhance long term prevention of moisture infiltration into the stucco system.
  10. Assure OSB sheathing substrates are classified as Exposure 1 or Exterior Grade.
  11. Assure wood framing and wood based sheathing is reasonably dry with a moisture content of 19% or less when the water-resistant barrier and lath are installed.
  12. A framing inspection should take place before a lath inspection. Appropriateness of flashings, treatments of penetrations and rough openings should be evaluated at that time.
  13. Water-resistive barriers should be installed with staples that do not protrude through the back side of the sheathing.
  14. Water-resistive barrier should be installed flat and taut to the substrate surface.
  15. All flashings and water-resistive barriers should be installed for positive drainage.
  16. Metal flashing materials should be a minimum 26 gauge galvanized sheet metal or anodized, coil coated or painted aluminum.
  17. All trim accessories should be galvanized steel, zinc alloy or anodized aluminum.
  18. Joinery of abutting ends of trim accessories should be spliced or lapped and sealed with appropriate sealant.
  19. Joinery of flashing sections should be appropriately lapped, sealed and mended together by application of sealants, adhesive backed membrane or other appropriate means of continuity.
  20. Any water-resistive barrier or membranes covering OSB joints should be lapped across said joints where appropriate and should remain unbroken where possible.
  21. Expansion joints should be located at points where significant building movement is anticipated: Wall penetrations, structural plate lines, junctures of dissimilar substrates, existing construction joints (stone), columns and cantilevers.
  22. Pullout resistance of drill and drive fasteners, power or powder actuated fasteners should meet the requirements of the fastener manufacturer.
  23. If there is any question about the effectiveness of the pullout strength of drill and drive fasteners, power or powder actuated fasteners into concrete or concrete masonry block, sample testing is recommended.

Leaking Windows: Masonry Veneer Walls

Windows are a common point of water infiltration into a building. Preventing moisture intrusion into building interior spaces near window openings requires proper flashing and careful installation. This is especially true if the windows are installed in masonry veneer cavity walls.

Chapter 7 of the 2009 International Residential Code requires protecting building material products sensitive to adverse weather from moisture damage. Dry wood structural members can expand, twist, distort, and deflect unpredictably when exposed to ongoing excessive moisture. If rainwater infiltrates into wall structural cavities through gaps along the window exterior perimeter, it can provide a continuous and damaging moisture source to unprotected interior materials. The result: Wood and interior covering material decay and rotting.

Window and masonry veneer wall systems have two moisture resistant components: The window flashing system and the masonry wall materials. When properly installed, these two components act together to repel rainwater or other forms of moisture. When damaged or defective, these systems may allow water to infiltrate from the window exterior areas to its interior areas. Usually, the water travels through the exterior masonry wall veneer gaps and holes along the window frame and the into the masonry cavity wall interior spaces. Once inside wall cavity, the water gravity can flow through even the tiniest of holes between the window frame flanges and their supporting wood studs. The resulting damage and decay to the unprotected interior and exterior building materials can be costly.

Properly repairing leaking windows requires a competent mix of flashing, carpentry, and masonry skills. Each trade must coordinate with the other to assure all three skills work together to form a single moister barrier to help keep water out of the building. Unfortunately, there are know known “off the shelf” drawings or details that apply to waterproofing every type of window. Thus, a competent builder or contractor will rely upon the prevailing codes, builder supplied manufacturer’s installation instructions, and applicable system standards to effect a successful repair. Once the window is properly installed and flashed, the stone mason must assure any gaps between the masonry mortar and the window frame are sealed with a resilient water resistive material such as silicone or caulk. The builder or general contractor should then perform a final diligence check of the window to assure its water tightness, while keeping in mind Chapter 7 of the 2009 International Residential Code is a governing code document for waterproofing exterior window openings.